NodeJS Express for JWT Auth Example
In this article, I will tell you how to use JSON Web Token (JWT) through the Express Framework. Previously, I explained JWT in general terms in my article “Laravel JWT Example”. You can view other details here. I will explain it here without going into details.
First of all, we need to create an express project. I use a generator for this. Let us set the express project
Test Environment

~ node -v (v15.1.0)

~ npm  -v (7.5.4)
npm install -g express-generator
Let’s create our project now
express nodejwt & cd nodejwt
Let’s include the JWT library in our project. You can find all the details of the library here.
npm i express-jwt
First of all, we create one route file and update it as follows.
const express = require('express');

const router = express.Router();
/* GET home page. */

router.get('/users', function(req, res, next) {

const fakeUsers = [

{

name: "Tolga Karabulut",

gender: "male",

age: 27,

email: "tolga.karabulut@medianova.com"

},

{

name: "Jhon Doe",

gender: "male",

age: 30,

email: "jhon.doe@example.com"

}

];

res.json( fakeUsers ).status(200);

});

module.exports = router;
We add the route file we created to our project.
const apiRouter = require('./routes/api');

...

const app = express();

....

app.use('/api/v1', apiRouter);
Here we need to pay attention to the issue, after other Middleware is included in the system, we need to call it “app.use”. Now we are testing the system quickly via Postman. First, let’s run our project.
DEBUG=nodejwt:* npm start
~nodejwt@0.0.0 start

~node ./bin/wwwnodejwt:server Listening on port 3000 +0ms
Now let’s make the “GET” request.
Yes, our system is working. We are adding the libraries we use now.
npm i jsonwebtoken

npm i express-jwt
Now we organize our route file as follows.
#_ routes/api.js const express = require('express');

const router = express.Router();

/**

* include library

*/

const expressJwt = require('express-jwt');

const jwt = require('jsonwebtoken');

/**

* JWT secret key

*/

const secretKey = "topSecretKey";
/**

* JWT Middleware

*/

router.use(

expressJwt(

{

secret: secretKey

, algorithms: ['HS256']

}

)

.unless(({path: ['/api/v1/login']})));
/**
* @GET users

*/

router.get('/users', function (req, res, next) {

const fakeUsers = [

{

name: "Tolga Karabulut",

gender: "male",

age: 27,

email: "tolga.karabulut@medianova.com"

},

{

name: "Jhon Doe",

gender: "male",

age: 30,

email: "jhon.doe@example.com"

}

];

res.json(fakeUsers).status(200);

});
/**

* Basic Login

*/

router.post('/login', (req, res) => {

if (

req.body.username !== 'admin'

&& req.body.password !== 'password'

) {

res.json(

{message: 'Username and password invalid'}

)

.status(400);

}

const token = jwt.sign(

{name: req.body.username}

, secretKey

, {expiresIn: 60 * 2, algorithm: 'HS256' }

);

res.json({"_token": token});

});
module.exports = router
Let’s examine the code now. First, we added the libraries that we will use with require (“), and then we wrote a Middleware to pass the requests coming here without verification.
/**

* JWT Middleware

*/

router.use(

expressJwt(

{

secret: secretKey

, algorithms: ['HS256']

}

)

.unless(({path: ['/api/v1/login']})));
We have specified the algorithm we will use here. In the Unless function, we add the ways that JWT verification is not done. Since we will not make a verification in the login process, we have added the login path.
/**

*  Basic Login

*/

router.post('/login', (req, res) => {

if (

req.body.username !== 'admin'

&& req.body.password !== 'password'

) {

res.json(

{message: 'Username and password invalid'}

)

.status(400);

}

const token = jwt.sign(

{name: req.body.username}

, secretKey

, {expiresIn: 60 * 2, algorithm: 'HS256' }

);

res.json({"_token": token});

});
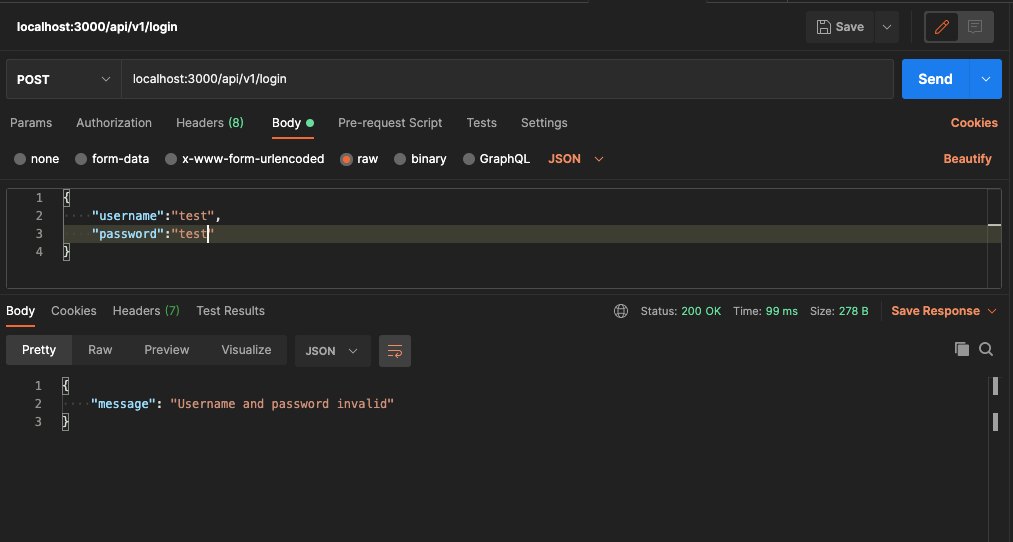
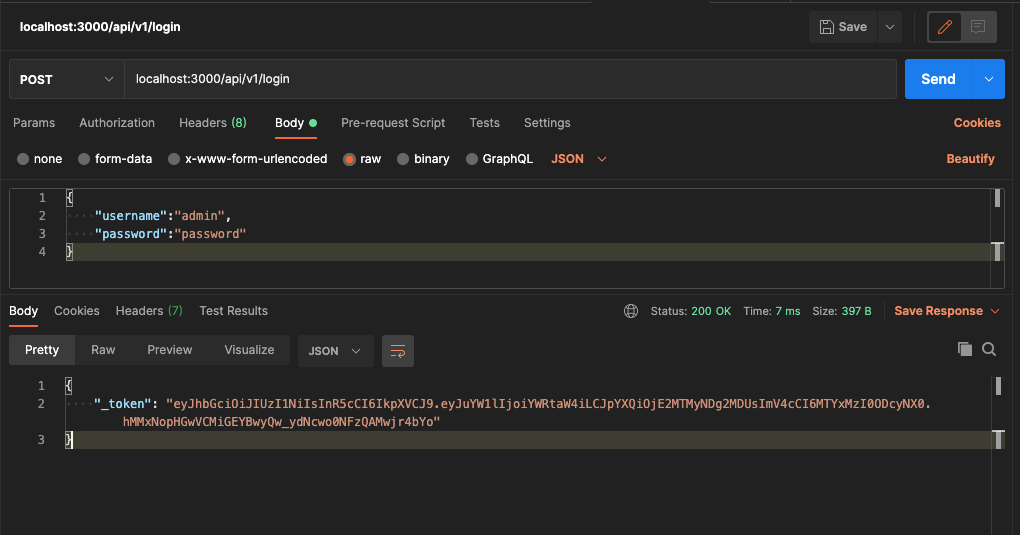
Here we are doing a simple login process. With Expired in, we tell you how long the token will be valid and we add useful information to the payload section. Now let’s test our login process.


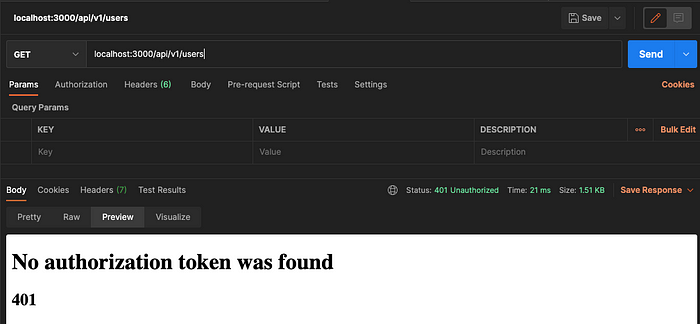
As you can see, when we sent the correct username and password, the system generated and sent us tokens. Now, let’s try to reach the “users” route without tokens.

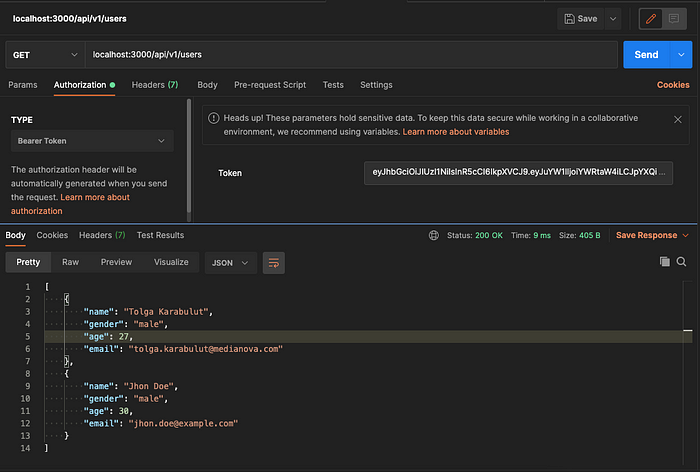
As you can see, we did not send a token, so the response was 401 – Unauthorized. Now let’s make a request with the right token and look at the result.

and we got the user list successfully. You can review the documentation of the libraries we use for other uses.
# Libraries
https://www.npmjs.com/package/express-jwt
https://www.npmjs.com/package/jsonwebtoken


